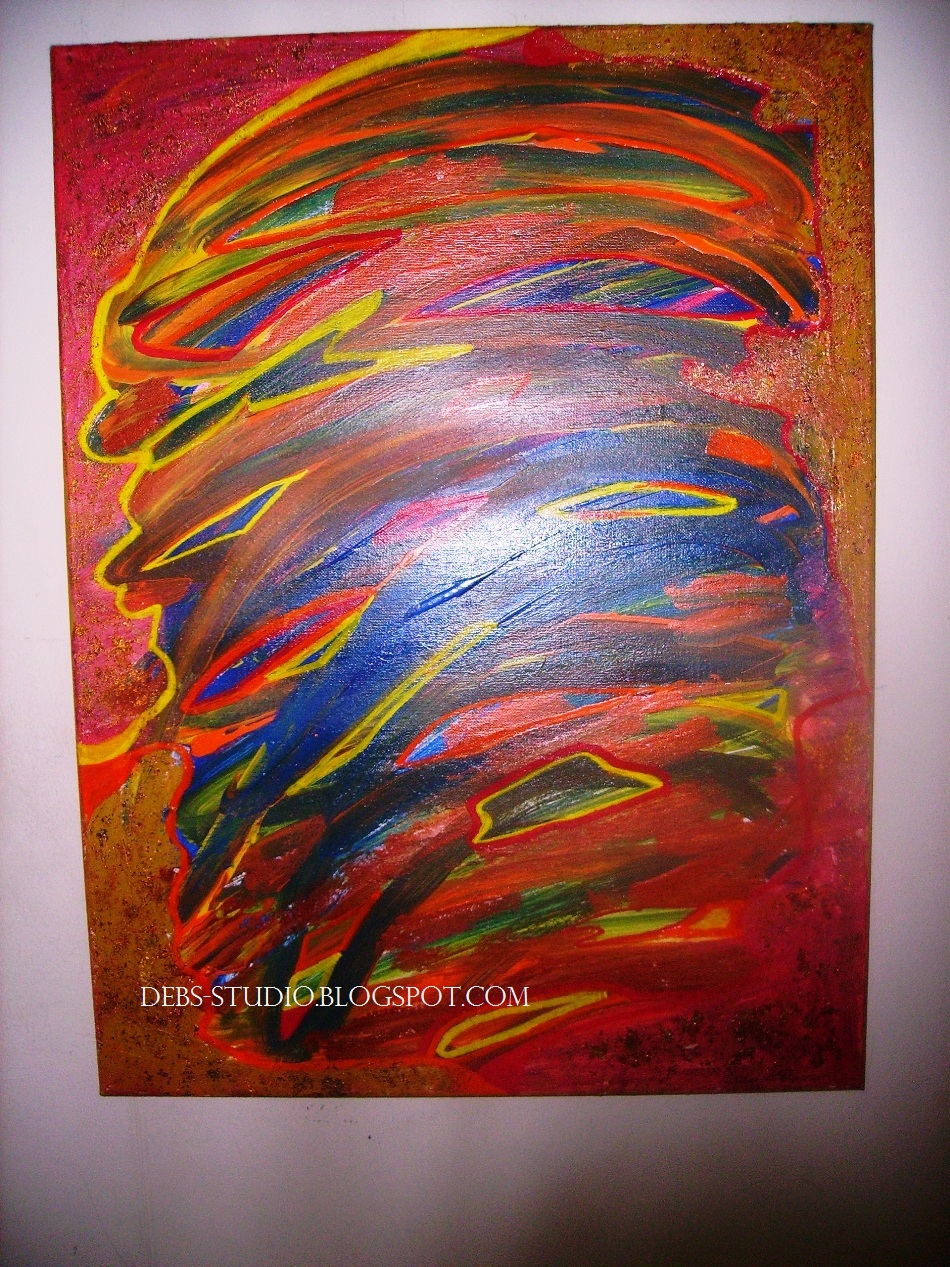
Sunday, October 26, 2014

Shadow Boxes and More ... Ideas I'm Sharing!

I've been getting ready for a craft show, so I made a few items to sell ...

Shadow boxes (one for Christmas):


Wall art, one of steampunk design and one entitled "Under the Sea:"


Then I found out that the craft show is off. But it's always to have finished art handy for the next event!

Thanks for stopping in!

Deb

Saturday, August 16, 2014

WABI SABI ART ... AGAIN

Hello dear ones!

In my June post, I explained the concept of wabi sabi.
Whenever I can, I like to take photos of wabi sabi-like things.
Well, I did a painting based on the photo.

Here's the painting and the photo is below it:


You see, a wabi sabi painting is simply a representation of the photo, not an exact duplicate feature for feature. That's the fun o wabi sabi (and abstract art, too). It doesn't have to be perfect, and that's what wabi sabi is.

Thanks for dropping by!

Until next time ... Deb


Sunday, July 20, 2014

Stained Glass Mosaics

Hello there!

It's the middle of summer and I haven't been to the pool even once. I just haven't been "up to" getting into a bathing suit, although my "old" one looks so much better on me than the new bathing suits that I tried on at Kohl's. I will get there soon, I think.

I'm getting ready for an arts and crafts show at my grandson's school in November, so I've been working on a lot of things. But this blog will only focus on my stained glass mosaic work. I'll show you one below, before and after grouting. The others can be viewed on my Pinterest board entitled "Mosaics."

Here goes:

Before grouting ...


After grouting ...

Grouting really does make a difference, doesn't it?

With mixed media art, there are so many choices of projects you can do. That's what I love about it.

All the best to you for now ... Deb

Wednesday, June 18, 2014

Wabi Sabi

I'm back again to talk about wabi sabi. In case you don't know what it is, here is an explanation that I got from Wikipedia:

Wabi-sabi (?) represents a comprehensive Japanese world view or aesthetic centered on the acceptance of transience and imperfection. The aesthetic is sometimes described as one of beauty that is "imperfect, impermanent, and incomplete".[1] It is a concept derived from the Buddhist teaching of the three marks of existence (三法印 sanbōin?), specifically impermanence (無常 mujō?), the other two being suffering ( ku?) and emptiness or absence of self-nature ( ?).

Here's an interesting explanation that I got from a Pinterest post:


There's a lot of information about wabi sabi on the web, if you want to look it up. You can also see more examples on my Pinterest board and other Pinterest posts.

As soon as I learned about wabi sabi, I was hooked on the concept. Below is a photo I took outside of my home. It is wabi sabi and it kind of looks like abstract art.


In fact, I just might use this photo to create a painting. If I do, I'll share it with you later!

Bye for now--Deb

Tuesday, May 13, 2014

More Fun with Photography

Hi there!

Just a short post with some of the photos I've taken over the past month or so.

Here's a better photo of the mosaic bookend than the one I posted last time:


And here are some photos from this spring:


I hope you've enjoyed them! Best wishes,
Deb

Thursday, April 17, 2014

Back With a Few Scattered Things!

Hi my blog friends--I'm back again with a few items to show you.

Take a discarded block of wood. Cover 4 sides with a mosaic made from sea glass, small mirror pieces, other glass pieces, and whatever you choose, using glue to adhere them. Paint the side that doesn't have mosaic on it ... and you have a bookend! I really needed one and I'm using it now. I have to admit, though, the photo could be a little more clear (getting used to new camera).

 
Below is a mosaic made by a 5-year-old boy, my neighbor, inside of an instant coffee lid.

 
And ... below is one made by his 12-year-old sister. She also created the cool-looking artwork underneath it. I thought they would make a great photo together.

 
Bye for now!
 
Deb

Wednesday, February 19, 2014

MY FIRST TIME USING OIL PAINTS

Hey there!
 
I saw a small, inexpensive set of oil paints in a store called Ross (Dress for Less), so I decided to buy and try them. Previously, I always painted with acrylic paints.
 
 
This is a triptych on three 5" x 7" flat canvas panels.
 
 
I'm not finished yet. I'll show you the final product on my next blog.


The idea of doing this blog came to me as a way of sharing my creative journey with others.
 
I haven't shared much about myself, personally, but that will come soon!

Until then ... bye for now and be well ...
Deb


Friday, January 31, 2014

"ACCIDENTAL" ART

Hi there!

This is a short post about a piece of art that I "accidentally" made.

I was working with melted wax (crayons actually). I was using a piece of orange paper to dab off the excess wax from the tools I was using. This went on for several weeks until I looked at the way the miscellaneous wax marks looked on the paper and I just had to frame and hang it.


There's just something about it that I like, especially the colors.

Have you ever made accidental art?

Best for now,
Deb

Wednesday, January 1, 2014

HAPPY 2014!! ... and ... try looking at your mixed media art using 3D glasses!

Hi bloggers. I know I've been away a long time. The holidays just messed with my mind and I just couldn't motivate myself to do anything in the art area ... other than make one card for the chiropractor, follow my usual favorite artist blogs, and stuff like that. I'm hoping that the next Christmas season is much better at the end of 2014!

I don't have any new art to show you this time, but I discovered something really cool that you might want to try ...

You know how mixed media art is done with layers of colors and textures? Well ... recently the children next door came over with a couple of pairs of 3D glasses, so we decided to put them on and look at my art on my walls.

It is really cool that, with the 3D glasses, you can actually see the layering on your mixed media art. It proves that mixed media layering truly is a form of 3D art!

Try it and let me know what you think. I was really amazed!

************

Next time, I'll hopefully have some new art to show you. I've signed up for Creative Jump Start 2014 spearheaded by Natalie Kalbach (http://nathaliesstudio.com), so I should get my creative juices flowing again. It's not too late to sign up--for only $20! There are many hundreds of people from all over the globe participating. Check it out on Nathalie's website!

My best to you ... Deb

Friday, November 29, 2013

Wire Basket

I apologize, yet again, for being away so long. But I'm so glad I'm posting to the blog today.

I hope Thanksgiving was great for all of you who observe it. Ours was excellent ... delicious food and no major kitchen mishaps--just one coffee spilling incident!

I usually show paintings or assemblage art, but today I'm showing you my latest basket created from jewelry wire.


I formed the basket around a vintage crock, sort of like a casserole, hence the "handles" on each side. I ended up having to break the crock in order to remove the basket. I really didn't want to break it, but it was the only way that I could remove the basket.

I'm making a lid for the basket, which I'll post later. Now all I have left of the crock/casserole is the lid that I'm using to make the wire lid for the basket.

This is all I have for now. I hope I'm not away from the blog for too long before posting again!

All the best,
Deb

Saturday, October 19, 2013

Photography Fun

Hi again ... it's me!

This post is mostly about photography. Did you know that even if you might not be able to afford Photoshop, you can use Microsoft Paint to "photoshop" your photos, create art, and do other cool things?

I recently took a photo of myself for a friend. She needed it for a school project since I'm the historical subject of the project. I used one of my computer programs to soften the look of the photo (Windows 8 comes with a good photo program for such things), but it looked like something was in my nose! Ugh.

So ... I opened the photo in Windows Paint and did a "photoshop" on the inside of the nostril. I know I need a lot more practice, but here's how it turned out:

You'll see in the left nostril that there's some grayish shading. That was from using Paint. Believe me ... it looks a lot better than it did originally. By the way, I'm not very photogenic, but this was the best photo I could take after about 30 tries! Also, I have trouble smiling for the camera!
 
 
On another note ... here's a nice photo that I took of a sunflower at a local garden show. There's really nothing that I would want to change, though.
 
 
On a final note ... I have a neighbor/friend who is a professional photographer. He took this photo of my ring for the project I mentioned above (a gift from my grandmother a very long time ago):
 
 
Ray can take any type of photo, and he does events like weddings. Here's his information if you want a great photographer:
 
8one8studios
Raymond Clarke, Photographer
Creative Personal Art
Custom Portraiture
Ultra Premium Finishes
Consultation/Shoots/Sales
Strictly by Appointment
Phone: 215-514-8498
 
It's been very nice chatting with you. I'll be back before too long!
 
Deb


Tuesday, October 1, 2013

MORE MELTED WAX ART

Hi, my blogging friends ...

I'm back again. I try to post at least once a month or more often. I hope I haven't been away longer than that!

My girlfriend from California told me about an art demonstration she saw where the artist rubbed a candle over his art. It planted a seed in me, so much so that I had to try it.

You just rub a white candle over your art on your substrate (as much as you choose) and then blow the surface with a hairdryer or a heat gun. The wax melts, covering the surface, and it looks cool. You can even shine the wax surface with a soft cloth. It really looks good.

Then ... I decided to buy a used Ranger melting pot through http://www.ebay.com so I could do my own wax melting. It has a nonstick surface that makes it easy to clean up. Here's what it looks like:
I show three crayons inside of the pot because I used mostly melted crayons to create the following piece, which I refer to as an experiment:

I used aluminum foil to create the sections and then I poured different color melted crayon wax into the sections. For the white part surrounding the circle in the middle, I melted plain white candles. I also added glitter to the melted wax. You just have to be careful how you pour your melted wax so it ends up where you want it to go. If not, you can clean up the mess without too much trouble!

This is all I have for today, except for the fact that I'm attending my first Meetup for artists tonight. It's called the Creative Collective for Artists and Artisans and it's located in Central New Jersey.

All the best to you!

Deb

Sunday, September 15, 2013

Garden ... Canvas ... Maybe More

HI MY BLOGSTERS,

I'M BACK AGAIN. SORRY I WAS GONE SO LONG. LIFE JUST GETS IN THE WAY.

HERE'S THE LATEST CANVAS I JUST FINISHED. I CALL IT REFLECTION.

I DID THE CANVAS WITH ACRYLIC PAINTS AND ACRYLIC MARKERS. IT TOOK ME A FEW WEEKS TO DECIDE HOW TO FINISH IT!


 THE ABOVE TWO PICS ARE MY MARIGOLD GARDEN.

THIS IS MY LOVELY LAVENDER PLANT. IT'S ON ITS THIRD YEAR OF BLOOMING. I'VE BEEN MAKING LAVENDER LEMONADE WITH IT. DELICIOUS!
 
GUESS THAT'S ALL I HAVE FOR NOW. I WISH I WOULD GET SOME COMMENTS FROM YOU WONDERFUL PEOPLE, BUT I GUESS YOU'RE TOO BUSY!
 
SO ... UNTIL NEXT TIME ... TATA AND KEEP CREATING!
 
DEB


Friday, September 6, 2013

Origami Lotus Flower

Hi again.

My good friend showed me how to create an origami lotus flower, so here it is:


You can learn how to create one yourself by going to


Below is a photo I took of a lotus (or water lily) at a local park called Grounds for Sculpture in Hamilton, NJ. You can easily find out about Grounds for Sculpture by doing a search on the Web. Thought it would be good to include this photo with the origami lotus.
See you later!
Deb

Friday, August 30, 2013

Abstract Canvas and Can Man

Hi everybody,

Just a quickie to show you my latest canvas.

I previously created something on this canvas, but I never liked it, so I took it apart, covered it with gesso, and created something new. I just call it Abstract on Canvas.


I learned a neat trick from a dear friend. You rub your canvas with a white candle to give it an interesting look. But I took it a step further: I blew the wax with a hair dryer and melted it so it covered the entire surface. Then, as I learned from a YouTube video, I polished it with a soft cloth so it has a nice shine.


Also, below is the Tin Can Man. My friend has it in her cabin in Nova Scotia and she sent me a photo of it. It was made entirely from cans and bottle caps. Good idea, no?


That's all I have for now ... see you again soon!
 
 
Deb

Wednesday, August 21, 2013

Fun and Silly Art Assemblage

Hey out here ... Just want to show you a fun assemblage piece that I created recently.

Her name is Mrs. Potato Masher Head (or should it be Ms.?).


I save all kinds of "junk" to make something cute or whacky (like this) when the mood strikes.
 
I had to buy a new potato masher, so I used the old one here. The head is made from one of my husband's white socks. The hair is yarn glued on. I made the rose in her hair from a piece of paper towel. And she's wearing a pair of earrings that I don't wear anymore. I added glitter to the handle and base to make it look fancy. I think you get the picture.
 
 
I hope you've enjoyed it!
 
 
Back soon ... Deb

Sunday, August 11, 2013

18 x 24 Canvas as Emotional Dumping Ground

Hi all ...

This is my latest canvas. I needed to express some heavy emotions in my art. What better way to do it than with creating an abstract piece.

Here it is. I call it Emotional Inferno.


Materials used: gesso, acrylic paints, acrylic paint markers (love them!), gold leaf bits pressed all around the sides (the inferno), and Plaid acrylic sealer spray (only use outside since breathing it in is toxic!)

I'd like to know what you think, but people seem to have problems leaving me comments. If you want to comment on any of my blogs, my email address is deborahapierro@comcast.net.

NOW I DIGRESS ...

I write for a wonderful magazine called i.d.e.a.l. Magazine. It is a quarterly magazine about and for promoting disabled people to be seen as successful, productive members of society. Until you read the magazine, you won't believe all of the wonderful people who have exceeded all expectations despite having suffered serious disabilities, amputations, and serious diseases that challenge them every day ... but they press on to do whatever it takes and become all that they can be, all the while encouraging other people with their words of wisdom that come from their experiences.

Please check out the website, www.itsanidealworld.com/ to see what the magazine is about and to subscribe. You can keep it for yourself, share it, or give it as a gift to someone who might need encouragement! You won't be sorry. Owner/Publisher Zarifa Roberson travels the country to create awareness and she deserves an expanding readership! Thanks in advance.

I'll see you next time when I'll be showing you a crazy piece of assemblage art that I'm almost finished with!

Peace and love ... Deb

Thursday, July 18, 2013

Improved Clown Assemblage ... and Latest Canvas

Hello my blog friends!

I'm back for a short time to show you the improved clown assemblage that I finished recently. It used to have blue paper clip arms; now it has better arms, white gloves, and bigger feet!

Here's what it used to look like:

Here's what it looks like now--my friend said it is a thousand times better!
 
 
And this is my latest canvas. My husband said to call it Metallic Wonder, so that's what I call  it. It has a lot of metallic acrylic paint in the first layer (gold, silver, copper) and in the grid on the middle right. The snake-like things are coils of wire that I glued on. (For some reason, I can't make the photo larger, though.)


I hope you like it.

Enjoy your day!

Deb


Sunday, June 30, 2013

NEW CANVAS ... GARDENS ... WHAT ELSE?

HI BLOGSTERS,

I'M BACK AGAIN WITH A NEW CANVAS THAT I CALL REFLECTION.

I DID THIS CANVAS USING ACRYLIC PAINTS AND ACRYLIC MARKERS. IT TOOK ME A FEW WEEKS TO FIGURE OUT HOW TO FINISH IT!


 THESE TWO PHOTOS ARE OF MY MARIGOLD GARDEN.

THIS IS MY LAVENDER PLANT, GOING ON THREE YEARS OF BLOOMING. I'VE BEEN MAKING LAVENDER LEMONDADE AND IT IS REALLY DELICIOUS. YOU CAN GET THE RECIPE FROM DOING A WEB SEARCH.


WELL, GUESS THAT'S ALL FOR NOW. I WISH SOME OF YOU WOULD COMMENT OR ASK QUESTIONS. IT WOULD REALLY BE GREAT FUN!

TATA ... DEB